

Discover more from Hot Dish with Sohla
Lately, I’ve been convinced that I’ve lost it (or maybe never even had it). Self-doubt creeps into my head periodically, but this round is big bad. I’m coming to the realization that I’m a mom now, which is breaking my brain in uncharted ways and making me doubt everything. I’ve always escaped these dark places by doing new things: trying out Kuri Nuki (Japanese handbuilt pottery), taking improv classes, or attempting to jog. But the little buddle of joy wreaking havoc on my mind and body is also limiting my ability to take a random flower arranging class on a Wednesday night. Please send me your suggestions on what I can do at home during 90-minute nap intervals to try and get my groove back.
In the meantime,
Here is a recipe that’s great if you’re also experiencing self-doubt because it’s impossible for it not to be delicious. (Okay, nothing is impossible, but this is close.) I made this recipe way too many times and found that even if it’s not perfect, breaded chicken cutlets with a bright, juicy, crunchy salad is always amazing. If the chicken comes out a dry, the breading falls off, it’s not evenly browned, or it’s underseasoned, the sweet-salty miso dressed salad heaped on top saves all! But I’m going tell you how to avoid those pitfalls, while knowing that all will be well even if you don’t.
Foolproof Three Step Breading
Standard breading procedure is also known as three step breading, where you first dredge whatever you are frying in flour, then egg wash, and then your final coating. This can be breadcrumbs, panko, cracker crumbs, cornmeal, crushed cereal, nuts, seeds, more flour, a combo of the above. The options are only limited by your imagination once you get the basics down:
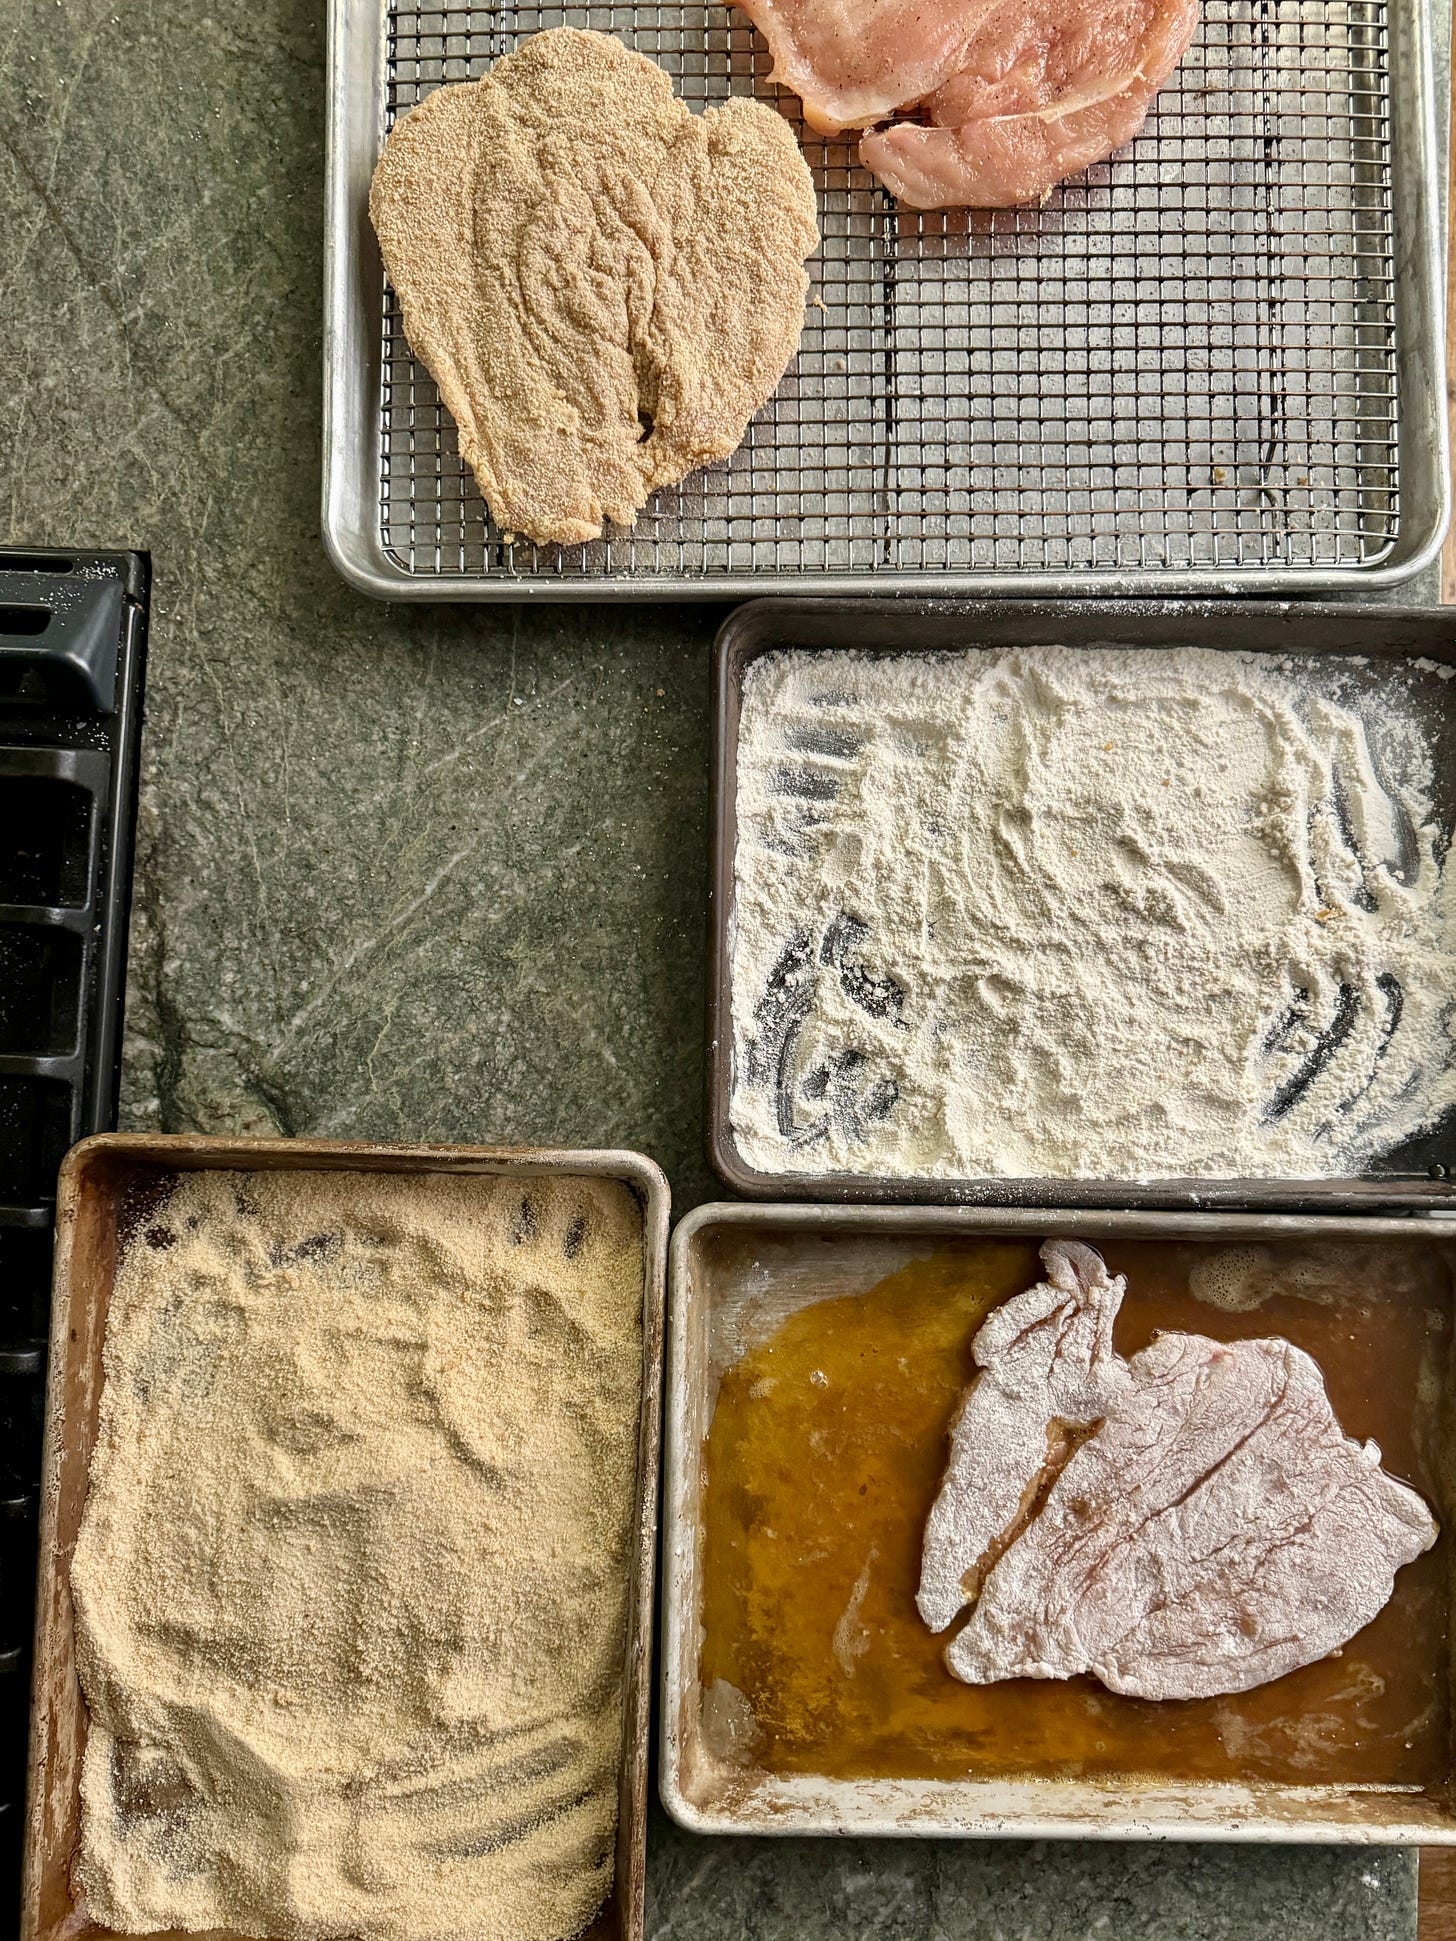
It’s all about the set up Breading can be messy, so set up a breading/frying station before you get going. Have three wide and shallow dishes (pie plates, cake pans, quarter sheet trays, etc) for your flour, egg, and coating. Make sure to have a landing zone for raw, breaded items and one for fried items. I like to use two sheet trays fitted with wire racks, but large plates will also work. It’s typically best practice to assign one hand for dipping into dry and the other for wet, but cutlets are so big and floppy you need two hands for all dipping, so I accept that my fingers will get breaded too.
Season each layer (the egg, flour, and final coating) at least with salt, but other spices if you desire. I sprinkle spices directly onto the chicken so nothing goes to waste, but there are some instances where it makes more sense to season the dredge, such as when breading ingredeints where the seasoning won’t readily adhere.
Keep each layer thin and even The primary reason breading may fall off is due to a thick and/or uneven application of each layer. If you want a thick layer of breading, repeat the process rather than attempting to make any one layer thicker.
If the chicken or other item you are breading is very wet, be sure to first pat it dry (this moisture is actually the first layer!).
Next, dredge it in the flour then pat to dust off any excess.
Make sure your egg wash is thoroughly whisked with a liquid, like water or milk, to thin it out. Beaten egg without thinning is thick and gloopy, impossible to apply in a thin, even layer. After dipping into the egg wash, allow excess wash to drip off.
Finally, press the item into the final layer to evenly adhere.
Give it a rest Let the breaded item briefly rest on a rack so the first flour layer can hydrate and help the crust hold tight after frying. I found that it only needs a few minutes, so by the time I’ve breaded the last cutlet, the first one is ready to fry. Some recipes suggest breading and chilling overnight. If you want to prep ahead, go for it. This will give the crust a heartier crunch because it gives time for the outer layer of breading to hydrate as well. (Ham hates this. I’m indifferent.)
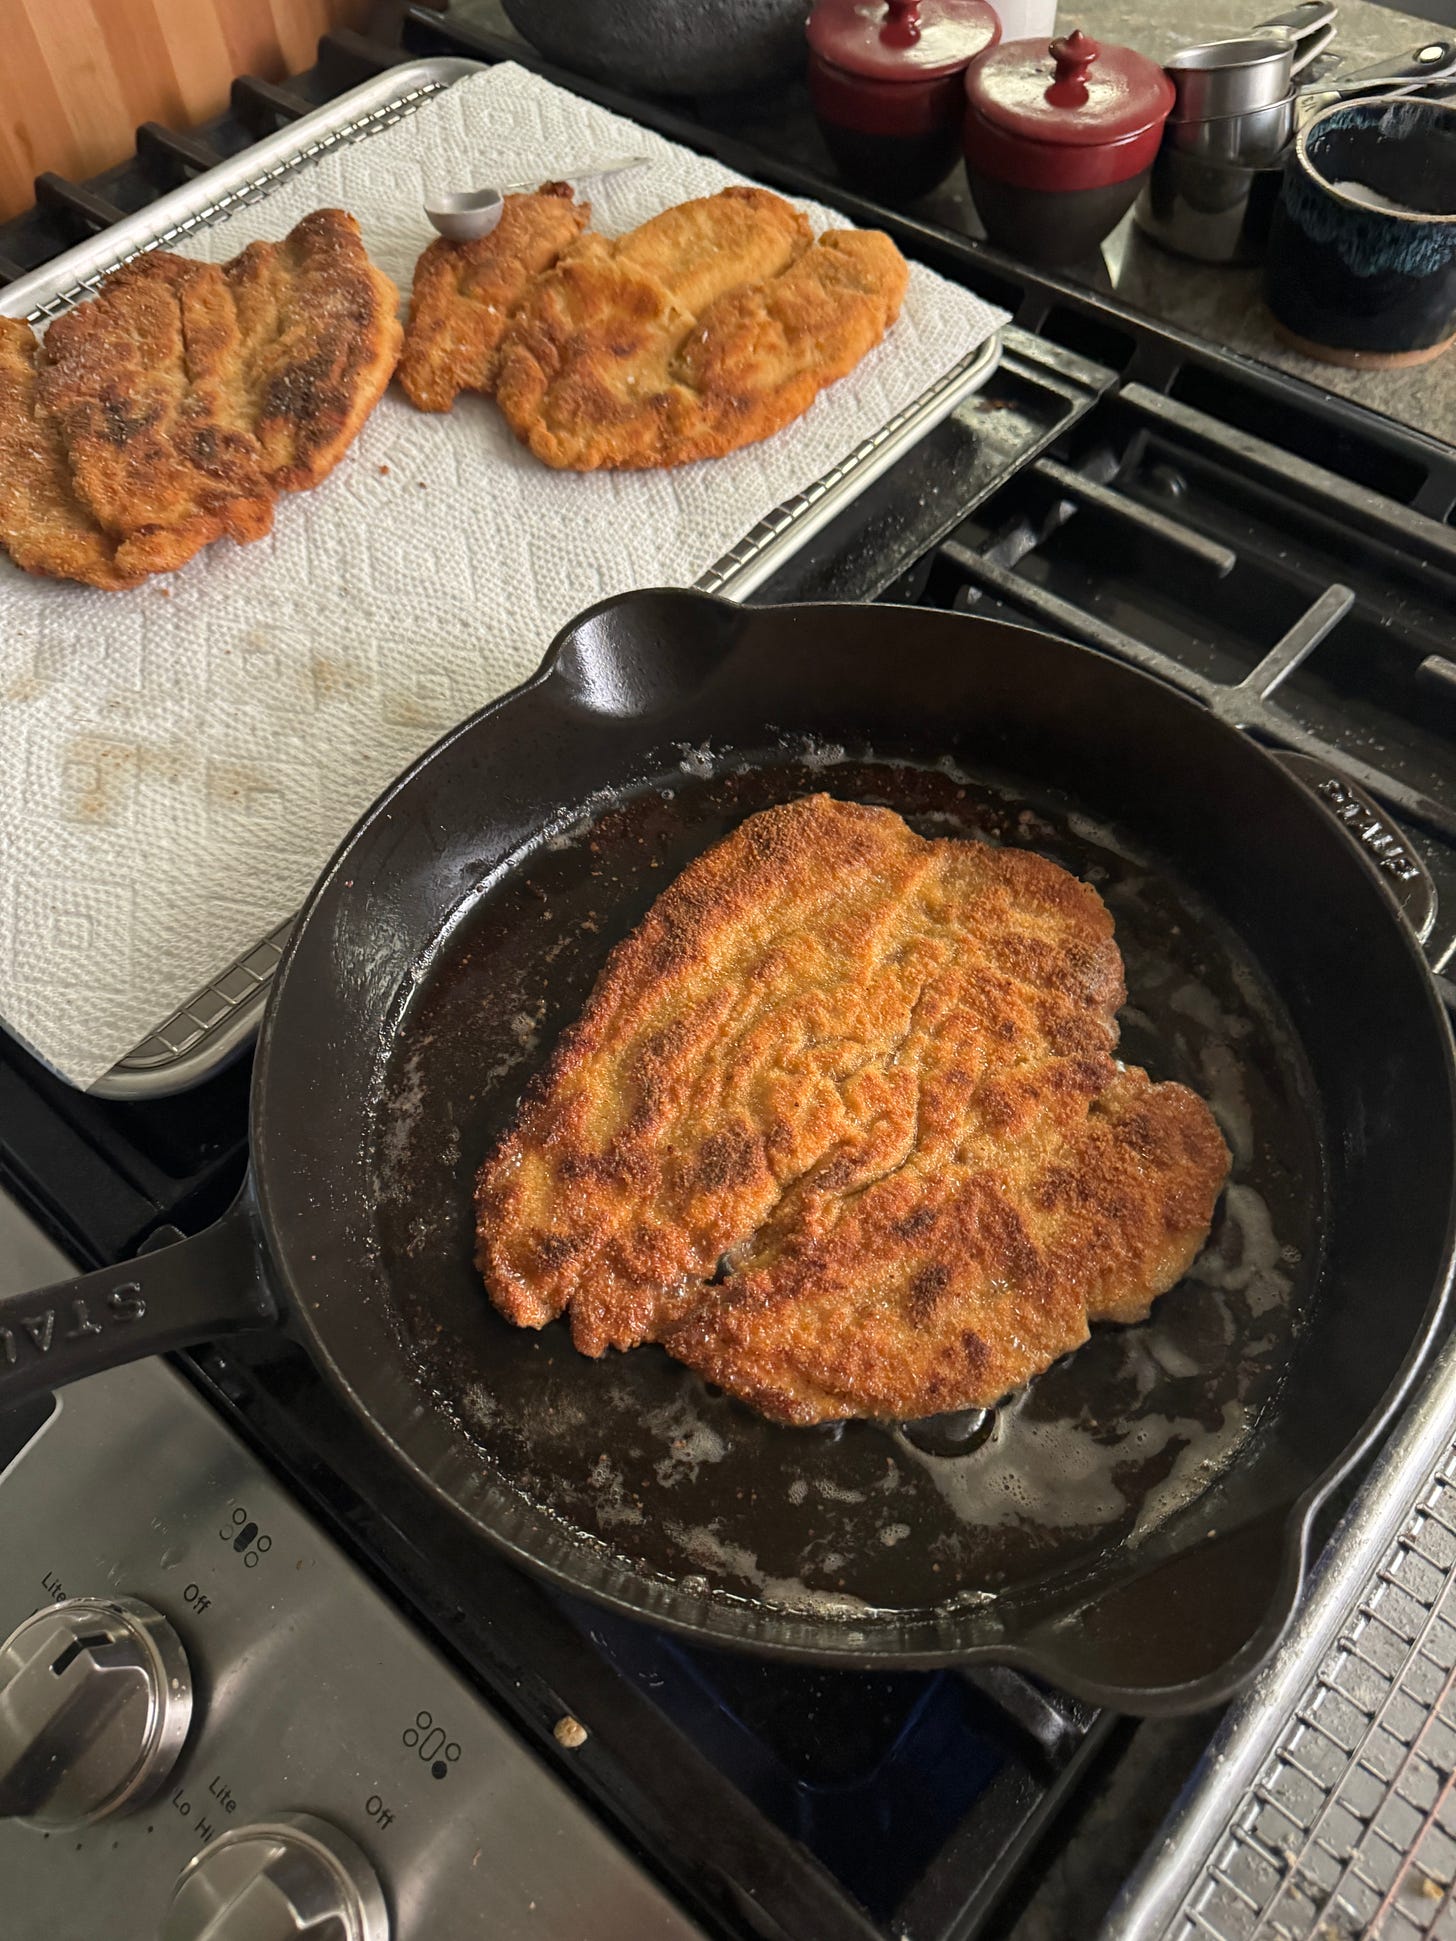
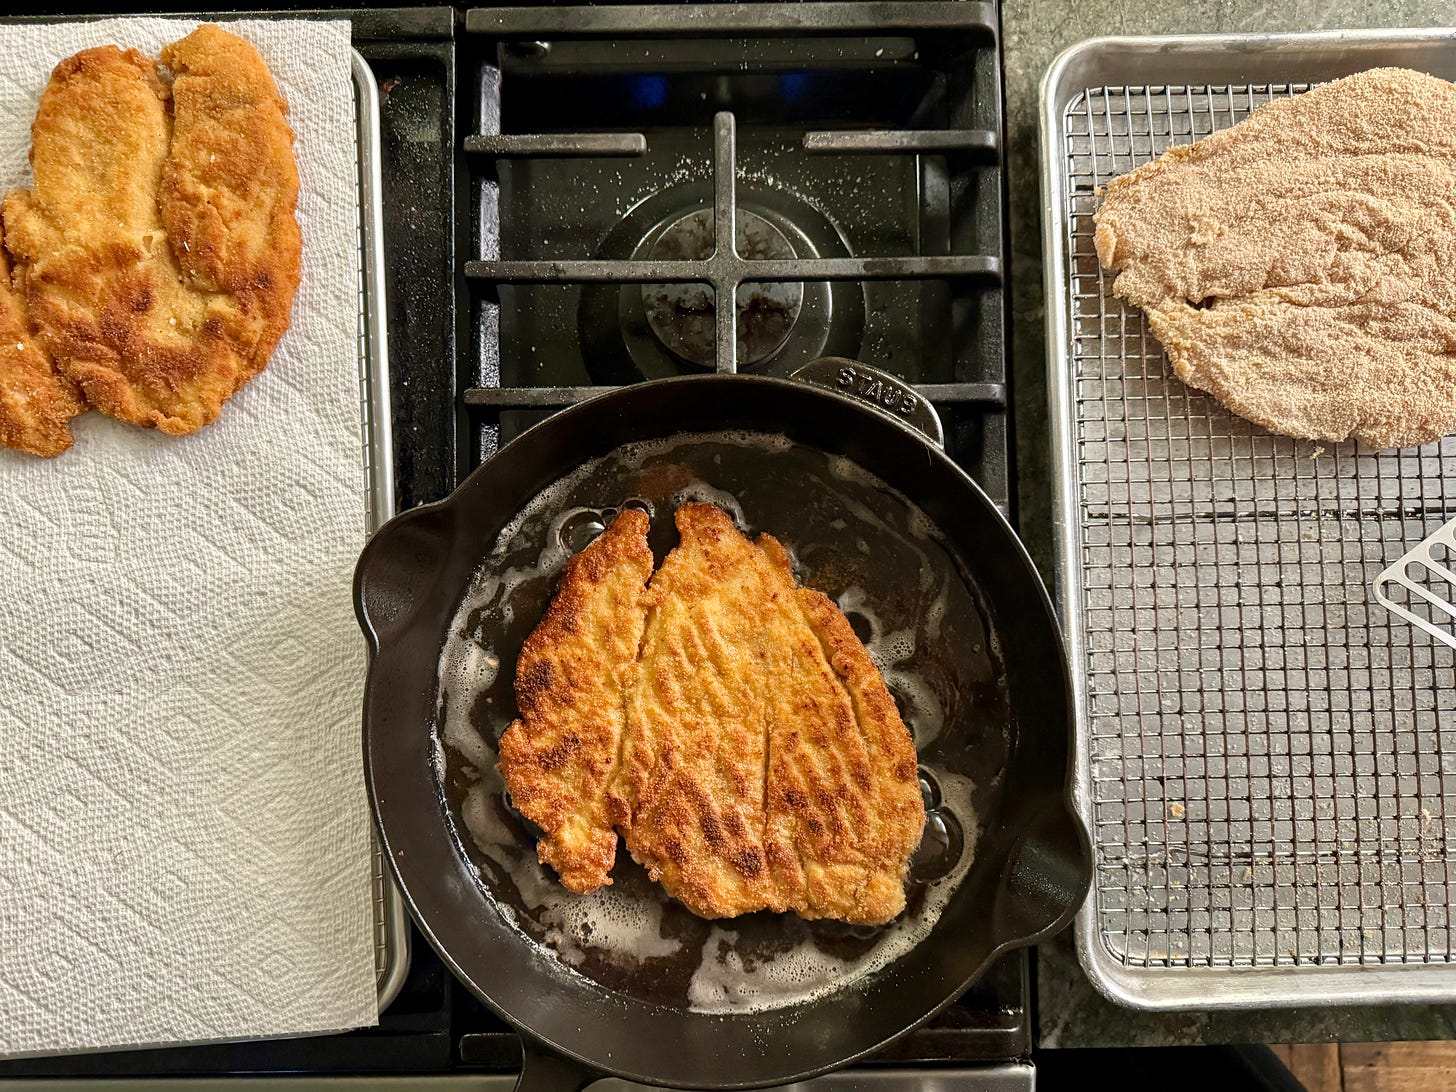
Fry in a heavy skillet I always fry, pan-fry, and well, cook just about everything in a cast iron skillet, but any heavy pan will do. A preheated heavy pan minimizes temperture fluctiations, so when you add cold chicken to a hot pan, that pan stays hot. If the temperture drops too low, the breading will become greasy, while too high and it will brown unevenly. Medium temperture in a heavy skillet is just right.
Other reasons this recipe is cool
Guaranteed to be juicy without an overnight brine or marinade
I was a guest on Dave Arnold’s podcast, Cooking Issues, where he shared his cutlet trick with me. It’s a game changer: Season the chicken breast before pounding it thin. I doubted this would make much difference, so I did two side-by-side tests. In both cases, the chicken seasoned after pounding looked and tasted significantly drier than the ones seasoned before pounding. It tastes as good as chicken that has been dry-brined overnight, but in an instant. (If you haven’t listened to Cooking Issues, I highly recommend it if you love food science and nerds. He’s the food nerd king.)
Seasoning salt so good I ate it like a Pixy Stick
The balance of salty, sweet, and a touch of MSG is perfect for anything fried. It’s sprinkled onto the chicken before pounding and after frying, ensuring that each cutlet is finger-licking good.
Magic 5-ingredient miso dressing
Miso is incredible, adding salt, funk, and keeps the dressing emulsified. Lots of lemon make it bright and a touch of honey rounds out the flavor. Keep this easy dressing in you back pocket for tossing with grilled or roasted vegetables, serving alongside fish, or as a marinade for roast chicken
Recipe notes
BREADCRUMBS: I prefer breading with plain breadcrumbs. Because they are so fine, they easily adhere and brown with minimal oil. You can use panko if you prefer, but you will need to add enough oil to you pan to come at least 1/4-inch up the sides.
CHICKEN: Breast vary greatly in size. The amount of breading in the recipe is enough to accomodate larger breasts, so if you have small ones there will be excess. If you can find already pounded cutlets, go for it!
SALAD: You don’t need to have the exact ingredients I use for this salad. After whisking up the dressing in a large bowl, fill it up with whatever crunchy veggies you have on hand, like cucumber, fennel, apple, or iceberg. By waiting to toss until just before serving everything will stay super crisp.
PS: Thanks for all your patience with me, as I’ve been terrible at posting consistently. My schedule has finally settled into a gentle pace, and spring is here (or close to it), which never fails to inspire me to cook. So, I promise there will be more frequent recipes coming your way. I really appreciate you all being here!
Crispy Chicken with Crunchy Salad
serves 4 | active time: 1 hour | total time: 1 hour
INGREDIENTS
For the salad:
¼ cup freshly squeezed lemon juice
3 tablespoons white miso paste
1 ½ teaspoons honey
½ teaspoon freshly ground black pepper
3 tablespoons extra virgin olive oil
6 celery stalks, thinly sliced
4 scallions, thinly sliced
2 Fresno chili, thinly sliced
6 radishes, thinly sliced
1 medium Asian pear, thinly sliced
1 head romaine, torn into bite-sized pieces
For the chicken:
1 tablespoon kosher salt
1 tablespoon granulated sugar
2 teaspoons onion powder
¾ teaspoon freshly ground pepper
⅛ teaspoon MSG (optional)
4 chicken breasts (1 ½ to 2 pounds)
2 cups breadcrumbs
1 cups all purpose flour
2 large eggs
1 tablespoon soy sauce
1 tablespoon water
neutral oil for frying
Prep the salad: In a large bowl, whisk together lemon juice, miso, honey, and pepper. Whisk in oil while slowly drizzling until creamy and emulsified. Add celery, scallions, chilies, radishes, pear, and romaine on top—but don’t toss! Store in the fridge while you prep the cutlets.
Season & pound cutlets: In a small bowl, stir together salt, sugar, onion powder, pepper, and MSG (if using). Reserve 1 tablespoon of the mixture for seasoning after frying. Pat the chicken breasts dry with a paper towel and arrange on a wire rack set on a sheet tray.
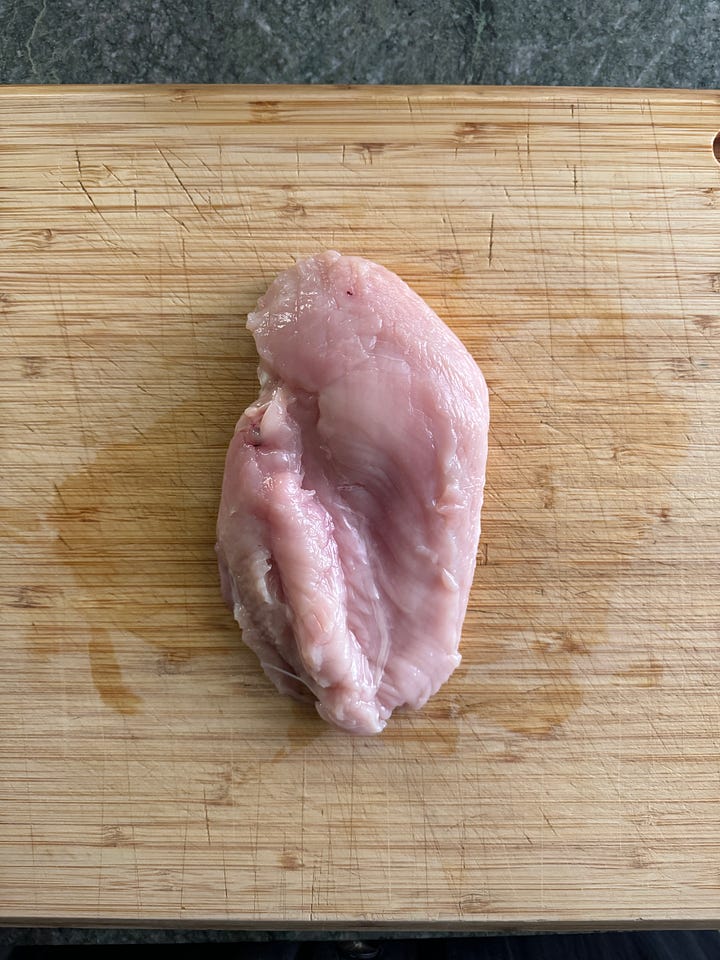
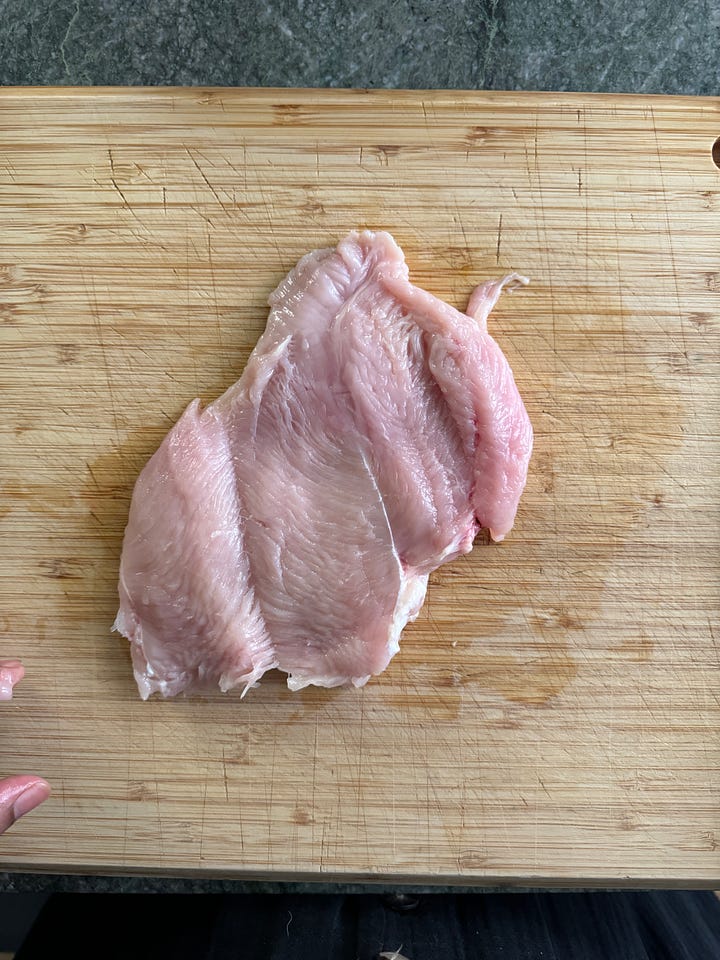
Place a chicken breast on a cutting board with the short side towards you. Use a sharp knife to slice along the long side to butterfly the breast, then open it up like a book. Return to the rack and repeat with the remaining chicken.
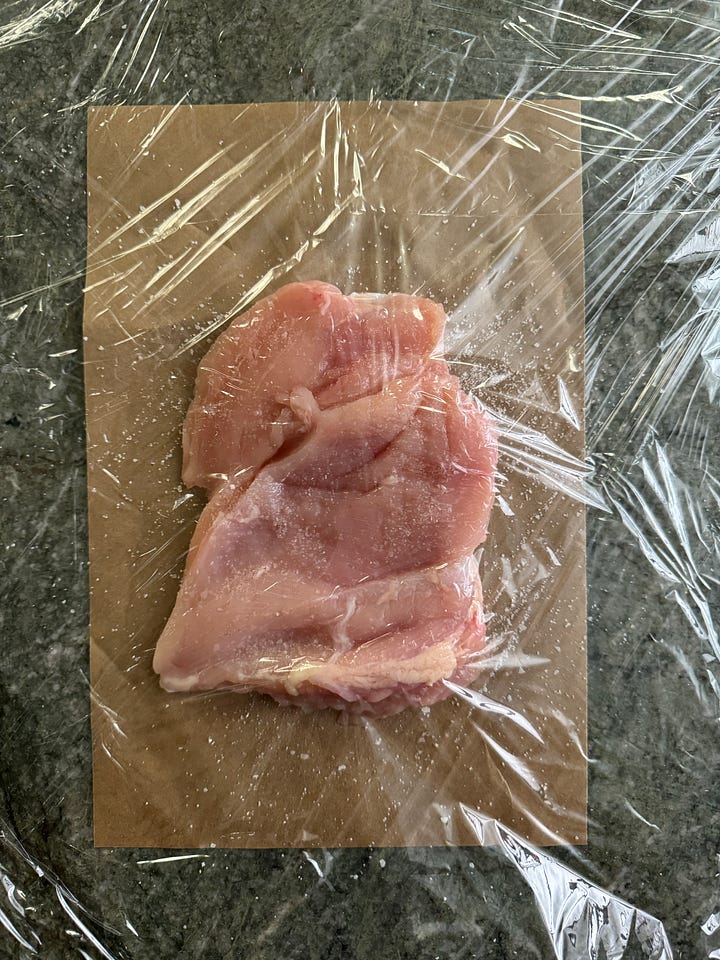
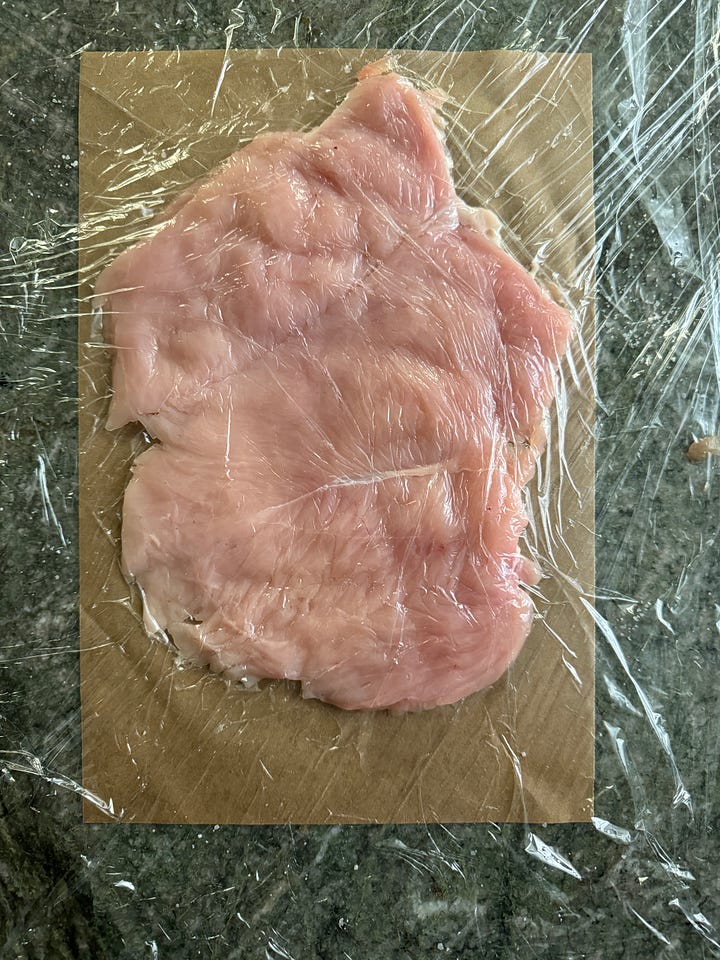
Season both sides of the butterflied breasts evenly with the salt mixture (depending on the size of your breasts, you may not need all of it). Working with one at a time, place a seasoned chicken breast between two sheets of plastic wrap and pound with a rolling pin or meat mallet until ¼-inch thick. Return to the rack and repeat with the remaining chicken.
Set up: Get 3 wide and shallow dishes, like a quarter sheet tray, pie plates, or cake pans. In one, add 2 cups of breadcrumbs and whisk in a big pinch of salt. In the second one, add the flour and whisk in a big pinch of salt. In the third, thoroughly whisk together the eggs, soy sauce, and water. Set a large skillet (preferably cast iron) over your largest burner. Set a wire rack into a sheet tray, line with paper towels, and set close to the pan. Have the reserved seasoning near by.
Bread chicken: Working with one breast at a time, dip both sides into the flour, then pat to shake off any excess. Dip both sides into the egg, then lift above the pan to allow any excess egg to drip off. Then place the cutlet into the breadcrumbs, packing the crumbs firmly to adhere to both sides. Return to the rack and repeat with remaining chicken.
Fry chicken: Add enough oil to generously cover the bottom of the pan and heat over medium until the oil shimmers, 2 to 4 minutes. Lay one cutlet into the pan, placing it into the pan away from you. Cook, undisturbed, until golden brown on one side, 2 to 3 minutes. Flip and cook until browned on the opposite side, 2 to 3 minutes. Transfer to the paper towel-lined rack and season evenly with a big pinch of the reserved salt mixture. Repeat with remaining breasts, adding oil to the pan as needed.
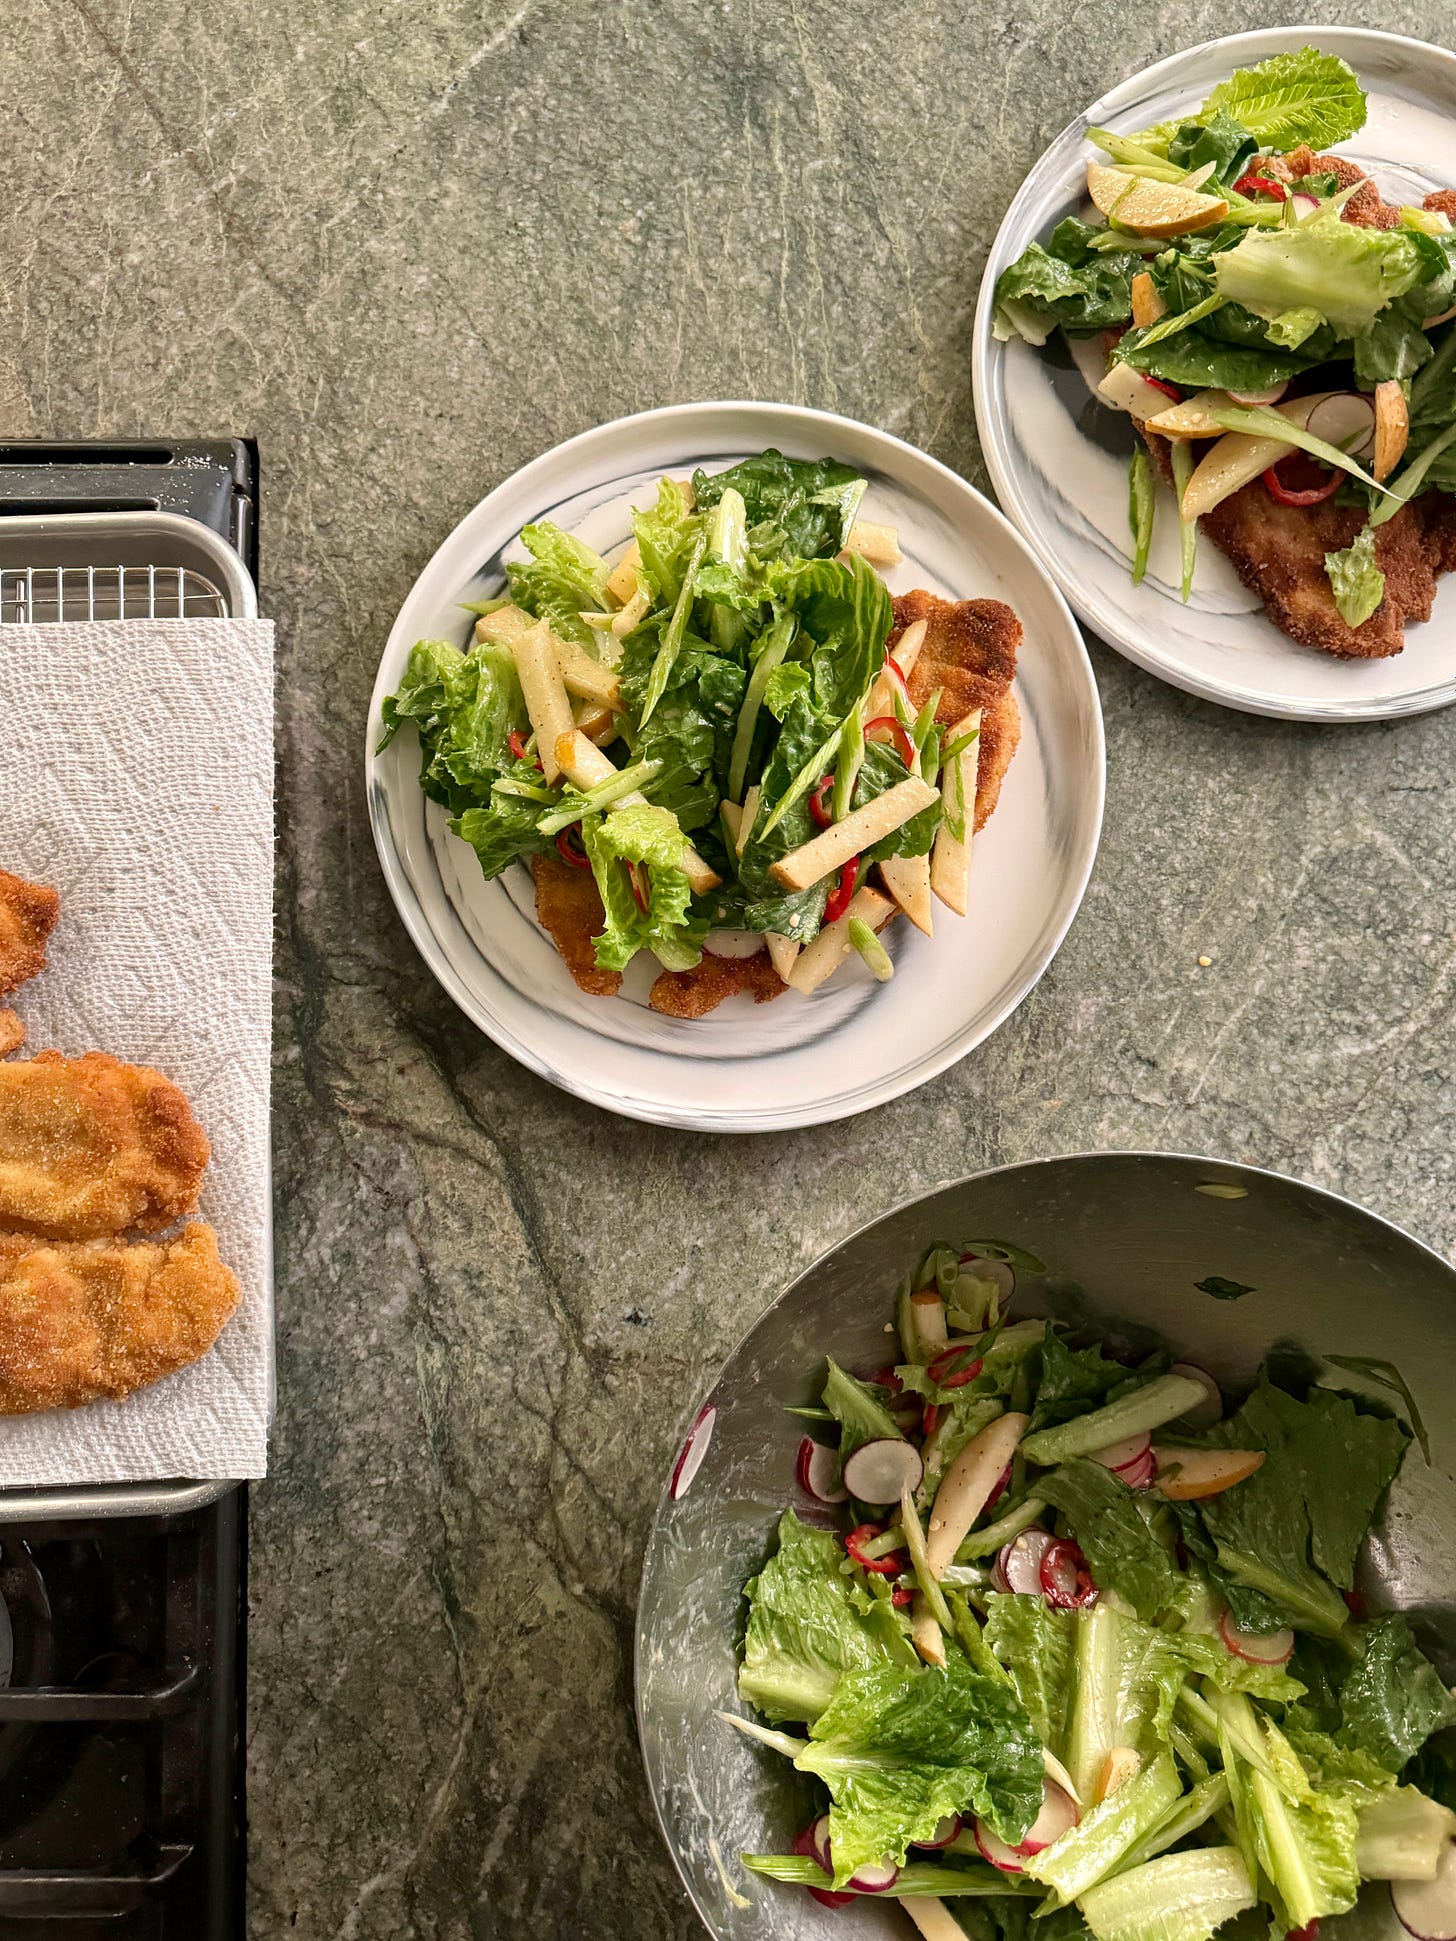
Serve: Toss the salad to coat everything in the dressing evenly. Place each cutlet on a plate and divide the salad on top. Serve right away.
Subscribe to Hot Dish with Sohla
New exclusive recipes every month! Featuring fun tips on how to riff and deep dives into culinary techniques—so you can be a boss in your kitchen.






I make this with thighs which I bone and skin myself because I roast up the skin and save the bones. A delicious recipe = the dressing alone is terrific. Thanks
Really enjoyed listening to you on Cooking Issues! Dave is indeed the food nerd king, lol.